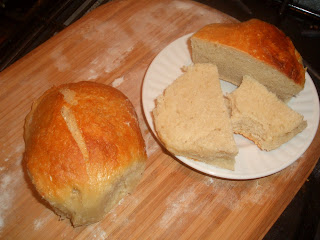
Let's proceed.
The recipe:
- 1 cup of your favorite cheddar, preferably without the Orange Glow of unnaturalness (no color added)
- 3 cups of lukewarm water
- 6 1/2 cups of all purpose flour
- 1 1/2 tablespoons of salt
- 1 1/2 tablespoons of yeast
- 1 1/2 tablespoons of sugar
I like my cheese natural. Un-oranged, if you will. Most people don't realize that cheese isn't and shouldn't, be orange in color. To get the orange cheddar most Americans are familiar with, food coloring is usually added to the cheese. I don't like it, doesn't make sense (must investigate) and more importantly, it doesn't add anything to the flavor or appearance. Having said that, because of that, you should feel free to use it if you like it. If you like orange cheese, use it! And yes, I know Tillamook has orange cheddar, but we prefer their Black Label Aged Reserve White Cheddar and this is what needs to be sent priority mail to my sister from time to time because she can't get it where she lives and my Costco carries it year round. So we've struck a deal: I will mail her cheese and she will mail me lemons from her coveted and worshiped lemon tree.
General Dough-Dos:
I just put everything in the Kitchenaid and pulsed slowly until it was incorporated. I then put the whole mass in a 6 quart storage container and let it rise on the counter for about 2 hours or until doubled in size. I punched the dough down (for me this step is a must or it will explode in the fridge as it continues to rise, but see for yourself ;) and then put it in the fridge until I was ready to use it. My dough for this recipe was 2 days old and made 10 huge rolls.
General Baking Instructions:
Preheat your oven to 350 and bake for about 30 minutes, depending on the shape of your bread and oven temperature. You should also have a baking stone or cookie sheet preheating on the middle shelf, with another baking sheet on the bottom rack to catch the water you will add to create steam when baking the bread. This step is pretty important and I know because I've tried it with and without. With steam, creates the right result. Without, it is still good, but the crust will be missing that crackle pop that makes this bread oh so good!
This bread can be baked like a loaf but I chose to tear off chunks, roll palm size balls and let them rest for about an hour or so before baking to let them rise. I rest the dough on a pizza peel heavily dusted with flour, but cornmeal is probably better to make it easier to slide them off onto the baking stone at bake-time.
Some Tricks to Employ, a Pep Talk:
When your oven is ready, prepare yourself by getting a cup of hot tap water ready to pour onto the bottom tray. This piece will take a bit of practice, so go slow and don't worry if you make a mess the first time. I have a trick of making sure that the bottom cookie sheet is pulled slightly to one side of the oven so that you can dump your water in the edge of the "steam pan" without freaking yourself out, but as long as you get the bread on the stone, the water in the steam pan and shut the door without burning yourself, you are in business.
You will want to a) slide the rolls into the oven on the hot baking stone or middle cookie sheet and b) as quickly and safely as you can, dump the hot water onto the bottom cookie sheet and quickly close the door to capture the steam. "Quickly" is a relative term and safety should always come first, but the idea is to capture as much steam as possible before shutting the oven door. Do it in two steps if you must, closing the oven door, gathering muster, what have you... opening the door and dumping the water the last thing before setting your timer for 30 minutes. And of course, goes without saying, but your cookie sheet should have edges, right? Otherwise, you're a right goof!
**It may not be so easy to "slide" the rolls and if they stick, help them off the pizza peel and arrange them on the stone. Mine didn't slide so well so I'll use cornmeal next time to make it easier to get them off, but no worries, if yours stick to your peel like mine did, just push them off with your fingers and arrange them as best you can for baking. Mine became a little misshapen, but who cares? They were still perfect and yummy to me. Don't forget to dump the water into the bottom pan to create steam before shutting the door and setting the timer!**
This recipe is indeed, a keeper. Seems to be a theme, huh?
Cookbook Recommendation and Credits:
Seriously, buy the cookbook by Zoe Francois and Jeff Hertzberg, MD. (I will add a link to the Amazon book as a sidebar; note to self. :)


