
Thai red curry is one of my all time favorite meals. I love it with just about any protein you can think of; I don't discriminate. As long as the curry sauce, which is the star, is right, mama's all right. And I can always judge a Thai restaurant by two things: it's red curry or tom kha. And since Thai food is quite a popular affair in our house, red curry has in recent years, become quite a BFD.
The most interesting red curry development in my household is that out of all the red curries you can typically get in most restaurants, roasted duck seems to be our family favorite.
Our kiddos tried red curry for the first time in New Zealand last year and granted, the restaurant we used for this Thai Experience was pretty fantastic. We do a sorta family date night. A date night, but like with the whole family. lol! It actually became a thing for us, complete with taking the train, the bus or the ferry, whichever suited our purpose, into the downtown action of Wellington.
We'd see an early evening movie and head out on foot for dinner afterwards, catching the bus home because we would usually be just late enough to miss our last ferry but definitely on time for the last bus home to Day's Bay. Yep, the whole family riding the bus. Hilarious and super entertaining, not just for me, but for everyone else on the bus as well. But memories like that... priceless; definitely something we all remember quite fondly.
And Roasted Duck Curry was always the highlight of the Saturday family date night if Thai food was the craving of the day. And it often was.
Recently, while debating the eternal "What's for dinner?" question, our middle son asked why we couldn't just make roasted duck curry at home. Oh, and sticky rice. Can't forget the sticky rice. And thus another inspirational culinary challenge was ignited. All systems a-go.
Except we'd never really made roasted duck before. Hence, our inspiration for this family favorite became the bar and the bar was rather high. Lucky for us, Costco carries the quack.
Unthwarted by the newness of this particular bird, we just aim for what we know best. Our smoker. But Tsunami doesn't just smoke this lovely little ducky, he brines it in our fermented pickled pepper brine from one of our hot sauce batches. He also throws in some aromatics like lemongrass, kaffir lime leaves and ginger. All of which, is grown organically in our garden. If you don't have this kinda malarkey going on in your kitchen, totally ok. This brine is really just a very light water, salt, vinegar mixture. You could easily get away with white wine. ;)
Once our bird was brined for 24 hours, it was removed, patted dry and thanks was given because that bird was about to get smoked with cherry and mesquite then, wait for it...deep fried. Just like a good 'ol Southern Thanksgiving turkey, y'all! All I can say about this is that this feathered friend nearly didn't make it to the curry, even though it was simmering low and slow on the stove. Yep, Southern Fried Smoke Duck was now in a class all it's own and could definitely be the ultimate scene-stealer. So good you might slap yo' mama and yo' papa if they tried to take too much of a nibble!
If you do not have access to duck and you prefer something more familiar like roasted (even rotisserie) chicken, then by all means, let that protein choice reign supreme. But... if you are a little daring... stretch, my friend and grab yo'self some duck. Splurge and indulge on something extraordinary once in a while. Even if you don't know what the hell you are doing, seriously.
As I said earlier, before I got off the quacking track here, the real star of this show is the red curry. So let me not dally dally any further.
Thai Red Curry Sauce:
- 1 tbsp Thai red curry paste (more or less to taste, we use about 4 heaping tbsp!)
- 1 tbsp palm sugar or to taste
**This seems to be an important, if not key, ratio. Doesn't matter how much curry paste you use if you stick to the same ratio of palm sugar. Start with 1 tbsp of each and never add more curry paste or palm sugar until the previous bit has been completely dissolved and incorporated. - 1 cup or so of coconut cream (I buy mine in the tetrapaks at the Asian grocery store)
- 2 13.5 oz cans of coconut milk
- 1 stalk of lemongrass, bottom 8 inches or so
- 4-5 fresh or frozen kaffir leaves (fresh are always more fragrant)
- 1 carrot, washed and sliced on the diagonal
- 1 c green bell pepper, cut into 1 inch chunks
- 1 c red grape cherry tomatoes, washed and left whole
- 1 sweet onion, sliced
- 1 c fresh pineapple or pitted lychee, optional
- 8 tbsp of fish sauce
- 8 tbsp fresh lime juice
- Fresh Thai basil and/or cilantro to garnish
- Fresh Thai chilis, optional
- And drum roll.... protein of your choosing


How to... make curry sauce
- In a heavy bottom soup pot, fry your curry paste on medium, stirring constantly so as not to burn. Once it has heated through, it will begin releasing oils.
- Add in your matching tablespoon of palm sugar, still stirring. Turn down your heat to low if it seems like the curry is getting too hot too fast. The palm sugar just needs time to incorporate a bit.
*I buy palm sugar in large disks or in small jars. If you can only find the disk form, it is so easy to grate with a hand grater or microplane. I can find the scoopable kind in little plastic tubs at my Asian grocery store, which works great too. If you can't find palm sugar (and yes, it's worth the effort and keeps a very very long time), you could substitute light brown sugar or regular sugar. - Add 1 can of coconut milk, stirring continuously to incorporate. Once it has been incorporated, you can add the second can. If you need more curry paste, add it and it's matching palm sugar, remembering your one to one ratio. Always make sure it is dissolved before adding more curry paste and/or palm sugar. We like this ration but if you find it is a tad too sweet, back off the palm sugar. Same is true of the red curry. This is really made to taste.
- Add lime juice and fish sauce.
- Add your aromatics. I take the lemongrass stalk and bash the crap out of the root end with the back of my chef knife or meat tenderizer. This releases the oils and will perfume the curry so nicely. Leaving the stalk in tact also makes it easier to remove prior to serving.
- Crush your kaffir lime leaves in your hand by rolling them a bit. This also releases the oils in the leaves. Add them to your curry. I leave them whole to make it easier to remove although some just leave these in even during serving. Personally, I don't like to serve anything that isn't digestible just in case you, too, have a goofball at the table that might try to eat it. Just sayin...
- Add your coconut cream, stirring well. Let curry sauce continue to simmer on med-low, turning down heat if it gets too hot.
- At this point, I usually start my jasmine or sticky rice. I'll link my Instapot (love this!) recipe for foolproof glutinous (sticky) rice soon but we either serve this with jasmine, sticky or an aged Basmati rice.
- I prep the rest of the ingredients, including the veggies and fruit, but won't add them to the curry until about 8-10 minutes just prior to serving. That's just me. I like a crunchy vegetable with texture but you can cook your veggies to your own taste.
Serve over a bed of jasmine or Basmati rice and add your sliced duck or chicky in a dazzling way on top. Or not... If you are making sticky rice, we usually serve that on the side as some prefer to dip their rice into their curry. It's a personal preference kinda jam.
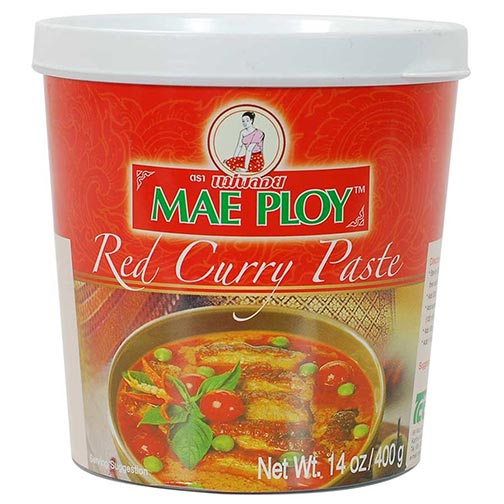
*A note about curry paste:
Sure, you can make your own and I highly recommend that you do. I also have a kicking recipe for homemade red curry paste but I haven't tried it yet. But when I do... look the f out. In the meantime, (not even I have the time for all my kitchen lab fantasies) do what I do every time and use this or your favorite pre-made paste.
I have a vacuum sealer so I will reseal my curry paste after every use just to keep it from oxidizing and to keep it fresh until I can use the whole container up. Works pretty well.
I have a vacuum sealer so I will reseal my curry paste after every use just to keep it from oxidizing and to keep it fresh until I can use the whole container up. Works pretty well.


